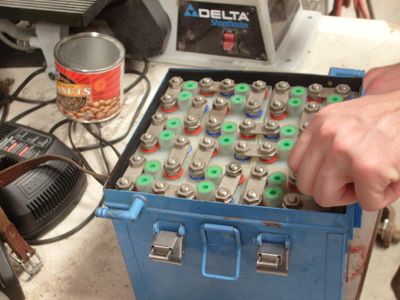
Reconditioning NiCad Batteries: A Beginner's Comprehensive Guide
Alright, you've got some old NiCad batteries sitting around, and you're thinking about giving them a second life. Maybe you're feeling a bit nostalgic for those classic cordless power tools, or maybe you just want to give those old toys a fresh start. Whatever the reason, you've come to the right place! This guide will walk you through the whole process of reconditioning NiCad batteries, from understanding the basics to actually getting them working again.
Now, I'm not going to sugarcoat it – reconditioning NiCad batteries isn't a guaranteed success. Sometimes, those batteries have just reached the end of their useful life. But, there's definitely a chance you can bring them back to life with a little bit of effort and know-how. So, grab your tools, get your soldering iron ready, and let's dive in!
What are NiCad Batteries?
Before we get into the nuts and bolts of reconditioning, let's quickly review what NiCad batteries are. NiCad (Nickel-Cadmium) batteries are rechargeable batteries that were super popular in the 80s and 90s. They were known for their long lifespan, high discharge rates, and ability to withstand a fair amount of abuse. But, there were downsides too. They had a nasty habit of developing the "memory effect" – where they lose their ability to hold a full charge if you always recharge them before they're completely drained. Plus, they contain cadmium, which is a toxic heavy metal. So, while they were the go-to batteries for a long time, they've been largely replaced by safer and more efficient battery chemistries like Li-ion.
Why Recondition NiCad Batteries?
Here's the deal: you can find reconditioned NiCad batteries available online, but it's not always easy to find the specific ones you need, especially if you're working with vintage gear. Plus, there's a certain sense of satisfaction that comes from bringing old tech back to life, right? And if you're feeling eco-conscious, reconditioning NiCad batteries can be a way to keep them out of landfills. But, remember, you'll need to dispose of them responsibly when they finally reach the end of their journey.
The Basics of Reconditioning NiCad Batteries
Reconditioning NiCad batteries is essentially about "resetting" their internal chemistry to improve their capacity and performance. This is achieved by using a process called "deep discharge and recharge" and sometimes by replacing the battery terminals or cleaning them.
Deep Discharge and Recharge
The core of the reconditioning process is a deep discharge and recharge cycle. Think of it like giving your battery a good workout. This cycle involves:
- Draining the Battery: Discharge the battery completely. You can do this by connecting it to a load until it's completely drained. This could be a lightbulb, a motor, or even a resistor. It's important to note: Do not short-circuit your batteries! It can be dangerous and potentially cause a fire.
- Rest: After the battery is completely drained, let it rest for a few hours or even overnight. This allows the battery to stabilize and allows for internal chemical reactions to settle.
- Recharge: Once the battery has rested, connect it to a compatible NiCad charger and charge it for at least 12 hours. Remember, you need a slow, controlled charge to recondition the battery effectively. This gives the battery a chance to absorb a full charge and "refresh" its internal structure.
Battery Terminal Replacement or Cleaning
Over time, the terminals of NiCad batteries can corrode or become loose. If you notice any corrosion or looseness, you'll want to address it.
- Replace: If the terminals are corroded beyond repair, you can try replacing them. You'll need to carefully desolder the old terminals and solder on new ones.
- Clean: If the terminals are just a little corroded, you can try cleaning them with a wire brush or a small piece of sandpaper. Just be careful not to scratch the surrounding plastic.
Reconditioning NiCad Batteries – The Steps
Now that you've got a basic understanding, let's dive into the actual reconditioning process! Remember, you should always work with a well-ventilated area, use appropriate safety gear, and handle batteries with care, as they can leak and contain hazardous substances.
- Gather your materials:
- NiCad batteries to recondition
- A compatible NiCad charger (ideally a slow charger with a timer function)
- A load to discharge the batteries (like a light bulb, resistor, or a small DC motor)
- A multimeter to monitor voltage and current (optional but helpful)
- Soldering iron and solder (if you need to replace terminals)
- Safety glasses
- Gloves
- Wire cutters or pliers
- Connect the battery to the load. The load should be connected to the battery's positive and negative terminals.
- Monitor the battery's voltage using a multimeter. You'll see the voltage drop as the battery discharges. Keep the load connected until the voltage drops to a very low level, usually around 0.8 to 1.0 volts.
- Once the voltage drops to the desired level, disconnect the load from the battery.
- Connect the battery to a compatible NiCad charger. Make sure you use a charger that is specifically designed for NiCad batteries. It should be a slow charger, with a timer function, ideally.
- Charge the battery for at least 12 hours. Some chargers may have a specific charging time for NiCad batteries, so follow the instructions carefully.
Important Tips and Cautions
Here are some key things to keep in mind for a smoother and safer reconditioning experience:
- Be careful! NiCad batteries can contain toxic substances, so wear appropriate safety gear and work in a well-ventilated area.
- Avoid overcharging: Overcharging NiCad batteries can damage them and shorten their lifespan. Use a charger specifically designed for NiCad batteries and follow the charging instructions carefully.
- Don't short-circuit batteries: Short-circuiting batteries can cause them to overheat, potentially leading to fire or explosion. Always handle batteries with care and avoid connecting the positive and negative terminals directly.
- Dispose properly: When your NiCad batteries finally reach the end of their life, it's important to dispose of them properly. Check your local regulations for safe disposal methods. Many communities have dedicated recycling centers for batteries.
The Takeaway
Reconditioning NiCad batteries can be a rewarding project. It can breathe new life into old devices, but it's not a foolproof solution. If you're willing to experiment and be cautious, you might just be able to give your old batteries a second chance. However, if you're unsure about the process or if you're dealing with a battery that seems dangerous or damaged, it's always best to consult a professional.
Remember, safety should always be your top priority when working with batteries. Happy reconditioning!

0 comments:
Post a Comment
Note: Only a member of this blog may post a comment.